Showing posts with label sweet. Show all posts

24 November 2011

Cranberry Pear Crisp

Gather your ingredients—you need to make this RIGHT NOW.

Now that's out of the way, I have a confession. Are you ready for this?

I have a deep, passionate, torrid, and terribly gratifying love affair with cranberries. It's almost an obsession. It's a fruit that grows beautifully in North America, has a distinct sweet/tart flavour, and, unfortunately, is harvested only two months out of the year. OK, here's a second confession: I buy them up when they're on sale in November and keep them in the freezer. Since you really never use raw cranberries for anything, freezing them has little effect on their usefulness or versatility, so it's ideal. You should try it. They'll be gone before you know it!

We opted to forego traditional pies this year, but replaced them with the most delicious fall harvest, sweet goodness in the whole world. You know you want it. This calls for gingersnaps, and I made my own molasses spice cookie for those, but you definitely don't need to do that. Maybe I'll post that recipe some time. Because both cranberries and pears are in season right now, they're both super cheap. GO! BUY SOME! MAKE THIS CRISP!

Cranberry Pear Crisp
adapted from Sweet Melissa Patisserie via Smitten Kitchen

Crumble
1 cup all-purpose flour
1/4 cup granulated sugar
3 tablespoons packed brown sugar
1 cup gingersnap crumbs (about 4 ounces)
1/8 teaspoon ground ginger
1/8 teaspoon table salt
Pinch of white pepper, [trust . . .]
1/2 cup (1 stick) unsalted butter, melted and cooled

Filling
5 large ripe pears (I used a combination of red and green Anjou) peeled, halved, cored and sliced 1/4 inch thick
1 1/2 cups fresh cranberries (about 1/2 bag)
Juice and finely grated zest of 1 lemon
1/2 teaspoon vanilla extract (use the kind you made at home with rum. Pears ♥ Rum . . .)
1/2 cup granulated sugar
2 tablespoons cornstarch

Preheat the oven to 350°F.

Stir together the flour, granulated sugar, brown sugar, gingersnap crumbs, ginger and salt. Stir in the melted butter until large crumbs form. Set aside.

In a 1 1/2 to 2 quart baking dish, mix the pears, cranberries, lemon juice, lemon zest and vanilla. Just dump them in there. If you want a thick crisp, go for a smaller, deeper pan. I used a large (10") square dish and the ratio of fruit to crumble was excellent. In a small bowl, whisk the sugar and cornstarch together then toss it with the fruit mixture in the pan. No extra spices, just sugar and thickener. This baby tastes like its fruit.

Sprinkle the gingersnap crumble over the fruit. Set the crumble on a foil-lined baking sheet if you're worried about bubble over (mine didn't because the dish was big) and bake it for about 45 minutes, until the crumble is a shade darker and you see juices bubbling through the crumbs.

Eat this thing ravenously and fresh from the oven. Or for breakfast. I think it would be great for breakfast. Or over ice cream. We used slightly sweetened fresh whipped cream and garnished with some of the leftover cookies.

WHAT ARE YOU WAITING FOR? GO NOW! BAKE!

10 September 2011

The Best Peach Jam I've Ever Had

OK, disclaimers first: I used nectarines, not peaches, because the sale-price nectarines were riper than the sale-price peaches. So there.

Back to our show: The jam. This batch of sugary goo is out. of. control. The boys wanted to just eat and eat it once I gave them a little taster. I intentionally preserved it in smaller jars so we wouldn't eat it all in one fell swoop once opened. It has a few less-than-conventional ingredients, but I think they are completely worth it. Oh, and go easy on the almond extract—we're talking drops, not anything more. That stuff will take over if you let it.

My Perfect Peach/Nectarine Jam
makes 6-8 cups

3-4 pounds ripe peaches and/or nectarines
7 1/2 cups sugar
1/4 cup lemon juice
1/2 cup water
1 cinnamon stick
1 vanilla bean, split
1/2 tsp unsalted butter
scant 1/8 tsp almond extract
2- 3oz. packets liquid pectin

Peel, pit, and chop peaches. Give them a good mashing—I used my hands and just squished them about, but you could also use a potato masher or pulse them a bit in a food processor. I got some great textural variety using my hands; I think I'd do it again.

Put peaches in a large, heavy saucepan, and add sugar, lemon juice, water, cinnamon stick, and vanilla. Stir to combine, and put over medium heat; stir until sugar is dissolved. Add butter and almond (I warned you—be careful with that stuff—err on the side of caution, and adjust to taste) and stir to combine. Heat, stirring constantly, until jam reaches a steady boil. Add both packets of pectin, and return to a boil. Boil 1 minute, remove from heat, and bottle that stuff using good common sense.

You don't have to preserve it of course. You could just put it in jars in the refrigerator and eat it up with a spoon. Or you could put it in a sweet dough shell and have an instant summer tart. No matter what you do with it, you're going to love the complex, smooth, summery flavour, especially in the dead of winter when you pull that jar off the pantry shelf. I know I'm looking forward to it.

21 May 2011

Ginger Lemon Birthday Cupcakes

Jacob turned five today and asked, ever so sweetly, for lemon cupcakes for his celebration. I have a strict policy to never make a cake from a box, but it's not a snooty, foodie, I'm so good sort of thing. It's just that homemade tastes so much better and is less effort than running to the store for a cake mix. It really is. Like, I had this ready to bake before the oven heated up. I could not have run to the store in that amount of time.


These turned out dense and moist, bordering on the crumb you'd get from a rich cornbread, but would be lighter, fluffier, and altogether cakier if you skipped the whole wheat flour in favour of another scoop of all-purpose. These were decidedly muffin-esque rather than cupcake-y. They were also quite satisfying, and would be as great for breakfast as for dessert, methinks.

Lemon Ginger Muffincakes
Based, ever-so-loosely, on another spicy, delicious muffin from Dorie Greenspan

1 cup all-purpose flour
1 cup whole wheat flour [mine is oh-so-finely ground]
1/2 cup sugar
1 Tbsp baking powder
1-2 Tbsp ground fresh ginger, or 1/2 tsp dried
1/4 tsp salt
1/4 cup brown sugar
1 stick butter, melted, but not hot
2 large eggs
3/4 cup milk
1/2 tsp vanilla
Grated zest of 2 lemons

Put your oven rack in the center, and preheat to 375˚F. Butter or spray a 12 cup muffin tin, or use paper liners. Put the muffin tin on a baking sheet.

In a large bowl, whisk together flour, sugar, salt, ginger, and baking powder. Stir in brown sugar, making sure there are no lumps. In another bowl, stir together butter, eggs, milk, and vanilla. Add wet ingredients into dry, and stir quickly, but gently, until the flour just disappears and the batter is lumpy. Gently stir in the lemon zest. Plop them into the muffin cups, and bake 20-22 minutes, or until a toothpick in the center comes out clean.


Thinking that the lemon of these would be rather subtle for a five year old, I shot homemade lemon curd into them, topped them with candied lemon slices, and frosted them with this to really up the lemon ante:

1/2 cup butter, softened
1/2 tsp vanilla
juice of 2 lemons
3-3 1/2 cups confectioner's sugar
1/4 cup lemon curd (optional)

Using a stand mixer with a paddle attachment, beat the butter until it's soft and fluffy, several minutes. Add vanilla and beat until combined. Add lemon juice and 2 cups of the confectioner's sugar. Beat until light and fluffy, adding more sugar, as needed, to obtain the desired consistency. Add lemon curd, if using, and add sugar, as necessary, to get it just the right thickness. This would also be nice with just a hint of ginger in it to keep the adult-level spice right where it should be, but I left it out this time.

06 February 2011

Pastry Cream

Since we hadn't eaten all day today, I decided it would be alright to revel in a little treat after our delicious Laksa dinner, so I started flipping through one of my favourite cookbooks for ideas and inspiration. I was compelled toward the section of Dorie Greenspan's Baking about basics. These are the recipes that come up again and again and are the foundation for other delicious desserts and variations. Well, there were plenty from which to choose including lemon cream and curd, sweet tart dough, basic pie dough, chocolate whipped cream, almond cream, and other basics that seemed anything but boring.
I settled on the Chocolate Shortbread Tart Crust and Pastry Cream. I made the crust as is, and I tell you it's fantastic—flaky, flavourful, crisp, buttery—everything you would expect from something that looks like pie crust but smells like brownies.

The pastry cream, however, I toyed with right out of the gate. You see, a few weeks ago I made an indulgent purchase and had a half pound of Indian vanilla beans shipped to my door so I could make vanilla extract. Well, that used maybe ten of them, so I fin myself in want of vanilla projects. If you don't have vanilla bean, you could easily just add more vanilla extract at the end, and it'll taste fantastic just the same. Here's what we enjoyed on top of our chocolatey crust.

Vanilla Orange Pastry Cream
adapted from Dorie Greenspan

1 cup milk
1 cup half & half
1 vanilla bean, split lengthwise, seeds scraped
zest of 1 orange, in long strips
6 egg yolks
1/2 cup sugar
1/3 cup cornstarch, sifted to remove clumps
1/2 tsp vanilla extract, or more to taste
3 1/2 Tbsp butter, cut into bits, room temperature

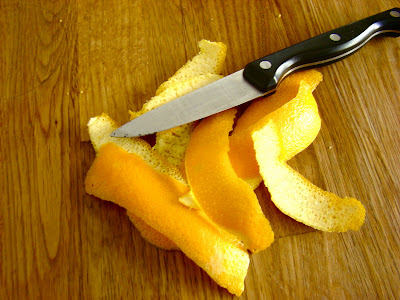
Use a vegetable peeler to peel the zest from the orange, taking care to get as little white pith as possible. Combine milk, half & half, vanilla bean and seeds with orange zest in a small, heavy saucepan. Bring to a boil, cover, and remove from heat. Let steep for at least one hour, or let cool completely and store in the refrigerator overnight. The longer it sits, the more flavour it will have (I did the hour and wished for just a bit more orange.)


After steeping is completed, strain out the bean and zest, and bring milk to boiling again. Rinse the vanilla bean well and save for another use (like vanilla sugar or extract.) Meanwhile, in another saucepan, combine egg yolks, sugar and cornstarch, and whisk well to combine. When milk boils, whisk 1/4-1/3 cup of the hot milk into the egg yolks, but take care to whisk constantly to warm the yolks without letting them cook. Slowly stream in the remaining milk while whisking constantly. Put the pot over medium heat, and whisk constantly until the micture comes to a boil. Continue to whisk 1-2 minutes until cream is thick, then remove from heat.


Whisk in vanilla and let cool 5 minutes, then whisk in butter pieces until the cream is smooth and beautiful. Scrape the cream into a bowl, press a piece of plastic wrap over the surface, and cool completely in the refrigerator. [You can speed this process with an ice bath, like I did, stirring every few minutes.]

Scoop that vanilla orange goodness into your chocolate tart shell (or graham crust, or pie shell—all would be delightful) and eat it up.

02 January 2011

Cranberry Upside Down Cake

We had friends over tonight. Again. Liz is on a friend-dinner-binge, and it's been fun. We recreated our holiday brisket and served it with noodles and it was fine, but the real star was the cake. I've never really been a fan of cake; I mean, why would you eat sugary, bouncy, dry cake when you can have fudgy, gooey, drippy, flavourful everything else. You see, boxed cakes, while labeled with myriad flavours like white, yellow, and confetti, all taste about that same—like sugar. I think the person who decided that colors=flavours should be ostracized from all world societies.

Then I discovered that cakes can taste like vanilla, chocolate, fruit, nuts, brown sugar, brown butter, or carrot. Or pumpkin. Or banana. Or cinnamon. This one is in the buttery, sweet, cinnamon category, and that's before the winter fruit and nuts. It's moist, tender crumb is perfect for serving anyone, but parents will especially appreciate it because it's not crumbly and messy; it stays together on plate and fork and is just dense enough to fill those last minute spaces in the tummy. Serve it with vanilla ice cream and you'll be very popular. You'll also thank yourself because it will look like a giant party cake without all the fuss. It's one layer (you could easily double it and make 2 cakes if you need) and flips over to reveal red, glistening jewels atop a moist bed of buttery cinnamon goodness. It's especially fitting for the holidays.

A note about the cranberries: They can be fresh or frozen, but since fresh are seeing their last good days, I suggest heaping a bunch of bags into the freezer for the coming months. You can take them straight from your freezer and put them in this recipe and no one will know they're not fresh. I'm sure you could sub in dried fruit, but it will be a completely different cake, so I don't suggest it at this point.


Cranberry Upside Down Cake
adapted from Dorie Greenspan

1 cup flour
1 tsp baking powder
1 tsp cinnamon
1/4 tsp salt
1 stick+6 Tbsp (1 3/4 sticks) butter, at room temperature
1/2 cup+6 Tbsp sugar
1/4 cup chopped pecans (what I used) or walnuts would also be good.
2 cups cranberries (no need to thaw if frozen)
2 eggs
1 tsp vanilla
1/3 cup milk
1/3 cup red currant jelly, optional, for glazing the cake

Put rack in the center of the oven and preheat to 350˚F. Pull out an 8" round cake pan. Combine flour, baking powder, cinnamon, and salt in a small bowl; set aside.

In a small pot over medium heat, melt 6 Tbsp butter, then add 6 Tbsp sugar and stir to combine. Bring to a boil, then pour into the bottom of the cake pan. Sprinkle nuts over the bottom of the pan, then put cranberries on top. Smooth them out the best you can, but don't get too crazy about it; just make sure they at least cover the bottom.

In a bowl combine 1 stick butter and 1/2 cup sugar and beat with a mixer until pale and creamy. Add eggs, one at a time, beating for 1 minute after each one. Blend in vanilla. Add 1/2 the dry ingredients and blend on low just until combined. Mix in milk, then add the rest of the dry ingredients. Spoon the batter over the cranberries and smooth out the top with an offset spatula.

Bake for 40-45 minutes, or until golden brown and it passes the "clean toothpick (or knife)" test. Remove from the oven and run a butter knife around the edge of the pan. Invert the cake onto a serving plate. If you want to use the jelly (I've done it both ways) warm it in the microwave for 30-45 seconds, until liquid. Brush over the cake, and serve.

with vanilla ice Cream, if possible.

13 December 2010

Something New

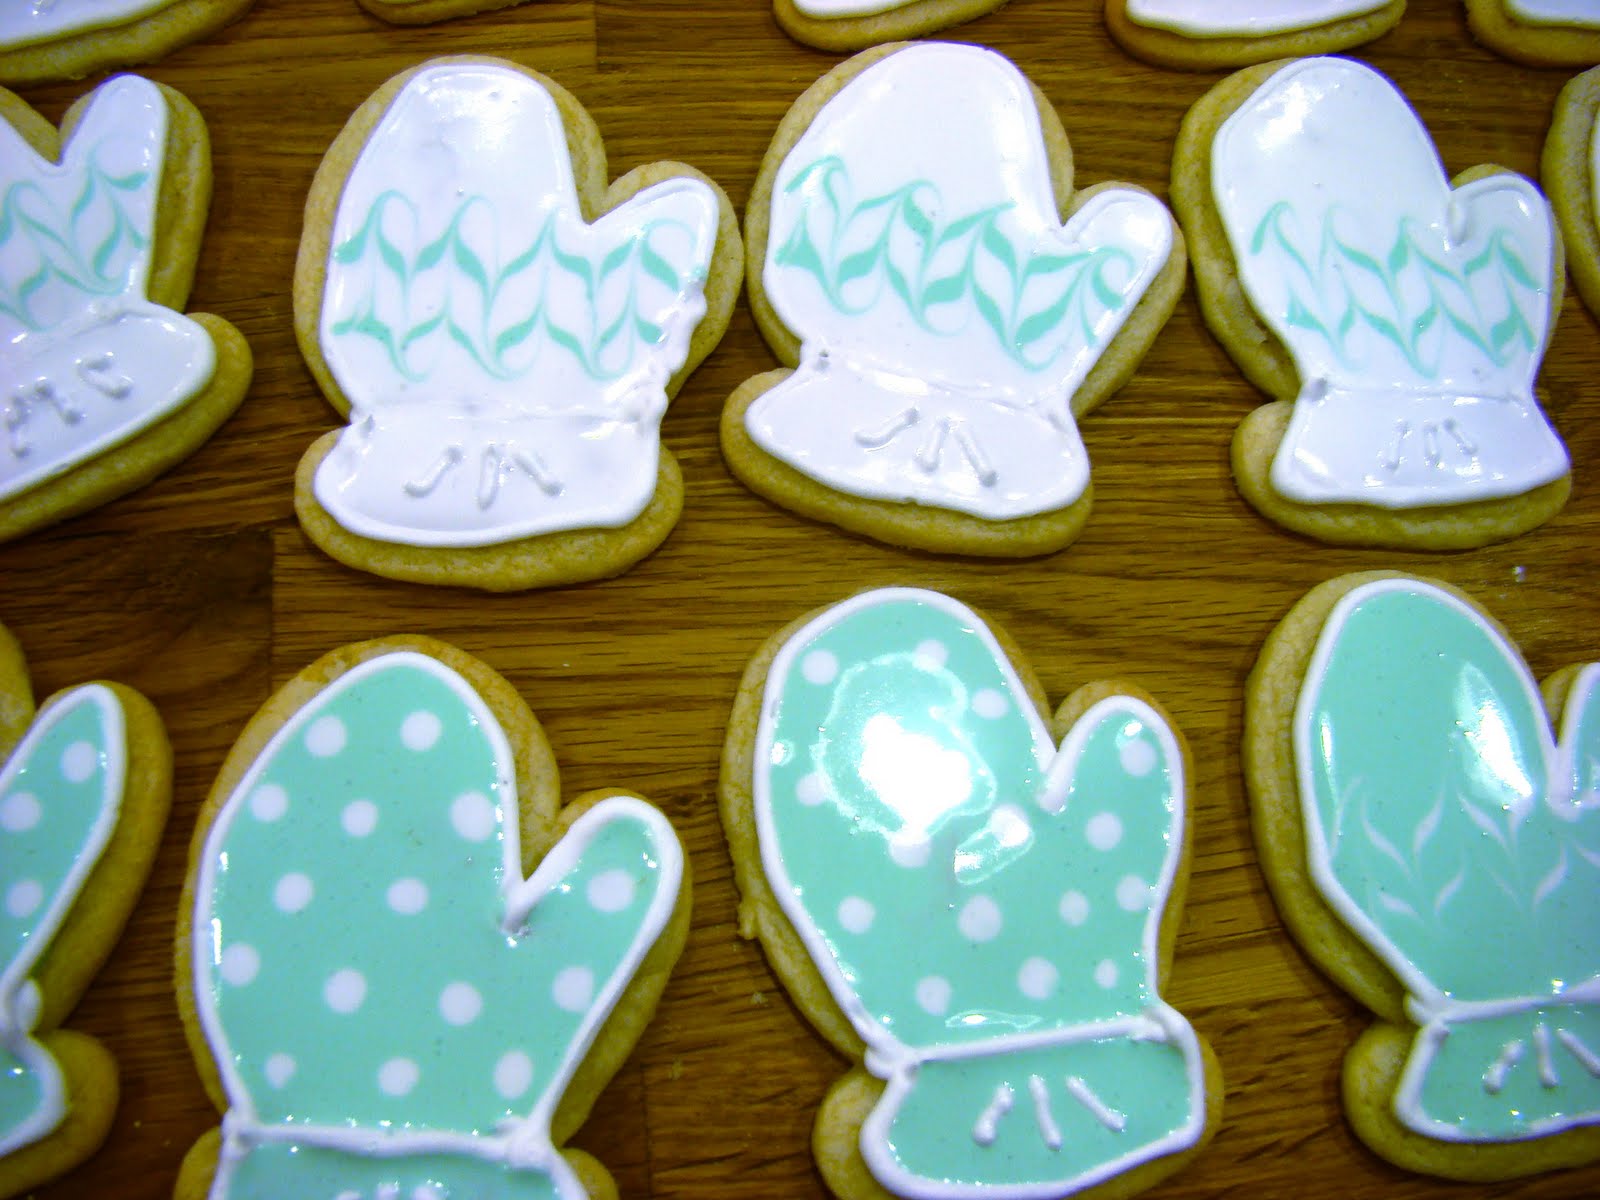
I'm not really a frou-frou kind of guy; I definitely prefer substance over fanciful and unnecessary decoration. I'm one of those people who actually uses the phrase, "gilding the lily" frequently. So, it surprised me as much as anyone when I discovered, tried, messed up, and retried this little skill. This is my third attempt, I believe, and I'm just starting to get the hang of it from the consistency of the icing to the time I have before it sets. I'm not going to lie—I could fall in love with fancily decorated sugar cookies, as long as they're Momlene's sugar cookies or a suitable variation. I've had fun trying different ideas, patterns, shapes, and color combinations. I've almost mastered the peppermint swirl you see on those candies, but I have yet to find a suitable canvas on which to use it. Sad, indeed.


09 December 2010

Homemade Chocolate Hazelnut Spread

Yes, Nutella.

Well, Nutella for adults.

Well, Nutella for adults without that super sweetness and the strange preservative chemicals and a texture you can't quite identify . . .

You get the idea. Make this, and make it now, and never look back. Grab some crusty bread, smear this on, and treat yourself to a truly blissful moment in which the hectic holiday season just melts around you into a puddle of rich, creamy, decadent hazelnut and chocolate.


After all, you deserve this, don't you?

Homemade Chocolate Hazelnut Spread
make about 1 1/2 cups

1 cup hazelnuts
1 cup almonds
3/4 cup powdered sugar
1/4 cup cocoa (dutch-processed is fine, and what I used)
1/4 tsp salt
2-3 Tbsp neutral oil, like canola

Preheat oven to 375˚F. Put hazelnuts and almonds on a rimmed sheet, but keep them separate (yet equal . . .) Toast them 8-10 minutes, or until they're fragrant and the hazelnut skins are peeling back. Remove from oven.

Now, this is the only annoying step: put the hazelnuts in a kitchen towel, wrap them up, and roll your hands over them like you're scrubbing the dirt from them. Aren't you glad you kept them separate from the almonds? You're just removing the skins, and they don't have to be perfect. Do your best, but don't fret about those few that just won't let go.

Combine hazelnuts & almonds in a dry food processor and blend those babies until they're smooth and creamy, 4-5 minutes. It really does take that long for the nuts to break down to the point where they'll release their oil to get a creamy butter. If you don't do it long enough it will still taste good, but it'll be more like that natural peanut butter you grind yourself in the supermarket: dry, pasty, and not quite what you were expecting.

When the nuts are smooth like drinkable calories, add the cocoa, powdered sugar, and salt. I always go a little heavy on the salt because it really brings out the chocolate flavour. It's a preference, so use your judgement, you know? Blend well. The oil is for consistency only. You want to add only enough to bring the spread back to, well, a spread. My last batch used 2 Tbsp, but you might need more or less. Blend for about 2 minutes to ensure the oil is emulsified.

My sources tell me this can store on the countertop for over a month, but I'd throw it in the fridge for keeping. Oh, who am I kidding? There's not gonna be leftovers.

Notes:
  • Don't skip the oven toasting of the nuts. Not only does it enable you to skin the hazelnuts, but it also removes the excess moisture from the nuts. If you don't remove the moisture, you'll end up with chunks and paste instead of a smooth, oily butter, and while it will taste the same, it won't be the same.
  • I'm serious about the salt; I may have put almost a 1/2 tsp in my last batch, but don't do it just because I said. Use wisdom, children, and be smart.
  • This is not going to be "just like Nutella," and I think it's better for it. It's not quite as sweet, and has a richer chocolate flavour. If you feel it needs extra cocoa or sugar, then add it, but keep in mind you may need to add more oil at the end to thin it out.
  • I imagine this would be delightful with hazelnut oil instead of a neutral one, but I never ever have it, and I'm guessing you usually don't either. If you try it, let me know how it goes.

04 December 2010

Chanukah Cookies

The first important note about this recipe is that there is nothing particularly Chanukah-esque about these cookies besides their star-of-David shape and light blue color. They do have almonds, which I suppose is a plus, but they are mostly just a fun way for us to incorporate symbolism into our festivities.

The second important point is that these are based on a recipe with which I've fallen in love, shared generously by Amy, the woman who taught me to be a diva that everyone still wants to be around. She calls them "Momlene's Sugar Cookies," and though I've never met Marlene/Momlene, I am indebted to her for her sugar cookie recipe that I've tweaked here. She's got a bunch of great funny, crafty, yummy stuff over there, so tell her I sent you and enjoy.

Momlene's [spiced] sugar cookies

2 1/4 cups powdered sugar
1 1/2 cups butter, softened
2 eggs
1 Tbsp vanilla
3 1/4 cups flour
1/2 cup ground almonds
1 1/2 tsp baking soda
1 1/2 tsp cream of tartar
1 tsp cinnamon

Cream butter and sugar until light and fluffy—take your time with it, it's relaxing as long you're using an electric mixer. Add egg and vanilla and beat well. Combine flour, almonds, soda, cream of tartar and cinnamon, then add to butter mixture, mixing until fully incorporated. Wrap tightly in plastic and refrigerate 2 hours or overnight. Remove from refrigerator and preheat oven to 350˚ F. Roll dough to 1/4 inch thickness (this is my favourite thickness for these) on a lightly floured surface. Cut into shapes and place on parchment lined sheets. Bake 8-10 minutes, or until firm and just starting to color. Makes about 6 dozen cookies, depending, of course, on how you shape them.

We dipped ours in melted candy coating to give them a little holiday flair. I'm a big fan.

11 November 2010

Shortbread+Caramel+Chocolate+Peanuts

I know that both of my faithful readers have nearly suffocated from bating their breath waiting for the recipe I teased about here. Alas, you shall not die, but your shallow respiration will now be rewarded with the recipe for what might be described as a grown-up Snickers bar. They're quite snickertastic, in fact, and Dorie Greenspan herself titled them Snickery Squares. So there you have it. They are included in the melange of bars and brownies featured here, the ones topped with chopped peanuts. I quite enjoyed these, and I think you will too. I mean, shortbread+milk caramel+chocolate+candied peanuts=bliss. Always. The instructions might seem a little involved, but every step seems just the right one to make them perfect, and I'd gladly do it again and again to have these to give (or eat myself . . .) Enjoy.

Snickery Squares
adapted from Dorie Greenspan

Crust:
1 cup flour
1/4 cup sugar
2 Tbsp confectioner's sugar
1/4 tsp salt
1 stick (8 Tbsp) butter, cut into pieces and cold
1 large egg yolk, lightly beaten (reserve white)

Filling:
1/3 cup sugar
3 Tbsp water
1 1/2 cups dry roasted (what I used) or salted peanuts
1 can (1.5 cups) store bought dulce de leche

Topping:
7 ounces bittersweet chocolate, coarsely chopped
1/2 stick (4 Tbsp) butter, cut into 8 pieces, and at room temperature

Preheat the oven to 350˚; butter an 8" square pan.

Combine flour, sugar, confectioner's sugar, and salt together and whisk. Add cold, diced butter and use your fingers, 2 knives, or a pastry blender to mix it in until you have a pebbly mixture (like pie crust!) Add egg yolk and blend until you get clumps and curds. If needed, add a little egg white to moisten it further (I needed, but I don't think I would have if I would have followed the food processor tip below.)

Gently press the dough into the buttered pan, making it as even as possible. Prick it all over with a fork, then send it to the oven, baking for 15-20 minutes, or until it just starts to color. Cool on a rack until room temperature before adding the rest.

For the filling, lay a sheet of parchment on your counter and grab a long-handled wooden spoon. Combine water and sugar in a small, heavy-bottomed saucepan and cook over medium high heat, stirring until the sugar dissolves. Once the sugar is dissolved, stop stirring, but continue heating until the caramel just starts to color. Add the peanuts and stir. Likely your caramel will cool and turn white on the peanuts, but keep stirring, and it'll re-caramelize. Keep cooking and stirring until the peanuts are covered with a dark, golden, amber caramel; this might take less time than you expect—it did for me. Immediately dump the nuts onto your prepared parchment and spread them with the spoon as thin as you can. Cool. When they are cool, separate the nuts into individual pieces as best you can. Take half of them and chop them for your topping and set aside. Take the remaining larger pieces and combine them with the dulce de leche and mix well; spread this evenly over the cooled shortbread.

Melt chocolate in a double boiler or in the microwave. Remove from heat and gently stir in butter until fully blended. Pour chocolate over the dulce de leche and smooth it with an offset spatula. Sprinkle with chopped peanuts and slide it into the refrigerator to set (20-30 minutes.)

NOTES:

Alternately, you can make the shortbread in a food processor by tossing in the flour, sugars, and salt, then pulsing in the butter, and finally pulsing the yolk into the crumbs, stopping before it comes together entirely.

These are also amazing thoroughly chilled (3 hours+) but the shortbread tend to crumble, so I set the chocolate, cut them and put them on a plate, then put them back into the refrigerator to get firm and chewy.

I found that I used fewer dishes if I washed while things were cooling. My caramel saucepan=lower half of my double boiler. 2 steps, 1 pan, fewer dishes. When you're on a baking binge like this, you have to be mindful of the dishes.

03 November 2010

Baking Baking Baking

I find that all I want to do anymore is bake. I have many life dreams, but among them, and floating near the top is this insane desire to bake delicious things. I think I could be very happy running a breakfast/lunch/sweet shop that also caters special occasions. Thought about it? Sure I have, but for now I'm just going to enjoy every moment of culinary delight within the walls of my own home.

And that thought comes with a confession. I may or may not have baked three different kinds of sweets today that will be carried to school tomorrow to be enjoyed by anyone I can pawn them off on. You see, when the family is away, I have a lot of time to myself, so I do what I enjoy most—bake. The sad thing is that I don't even have my mediocre camera to photograph these luscious sweets because Liz has it in Boston/Philadelphia/Washington D.C. Alas, cameraphone will have to do. Yes, I just made it one word.

So, while my big entrepreneurial dreams are simmering, I'm practicing my heart out, and here's the badly lit proof.

03 October 2010

Cornmeal+Butterscotch

You know, I just can't say sing adequate praise about the Add9 concert last night; it was top notch, and all 13 people there were edified by it. Equally spectacular were the refreshments I spent a warm day in the kitchen creating and now share with you. I wanted something oat-y for the this new and welcome autumn weather, so I went to the oat-laden cookie of my childhood: The Cowboy Cookie. I don't know the origins of this, but I wouldn't be surprised to find it in a Betty Crocker classic Cooky Book or similar timeless tome. I changed it, though, and the result was hearty, wholesome, flavourful, and easily the favourite cookie of the night.

Cornmeal Butterscotch Cowboys

1 cup butter, softened
1 cup loosely packed brown sugar
1 cup granulated sugar
2 eggs
2 tsp vanilla
1 1/2 cups unbleached flour
1/2 cup finely ground cornmeal
1 tsp baking soda
1/2 tsp baking powder
1 tsp salt
2 cups rolled oats (not quick cooking)
2 cups butterscotch chips

Preheat oven to 375˚. Cream butter and sugars. Add eggs and beat until light and fluffy, 3-5 minutes. Sift together flour, soda, powder, and salt. Add to butter mixture, and mix to combine. Add oats and butterscotch chips and mix until combined. Drop by rounded tablespoon onto a parchment-lined baking sheet and bake on the middle rack until brown and golden around the edges, 12-15 minutes. Carefully remove to cooling rack and cool completely.

Quick notes:
  • The middle rack was important because otherwise the bottom didn't cook well enough—one batch ended up beautiful on top and hollow and gooey on the bottom. weird.
  • If you're afraid of the cornmeal, which you shouldn't be, you could use whole wheat flour or plain old boring AP flour instead, but you'll never know that wholesome cornmeal flavour and your life will be duller for it.
  • Yearning for the original Cowboy? Make the following changes: use shortening instead of butter, 1 tsp of the vanilla becomes 1 tsp maple extract, flour instead of cornmeal, and use chocolate chips. Yeah, I know, it's a completely different cookie, but I thought it was worth acknowledging my inspiration.

29 September 2010

Jalapeño Jelly

I have a new bane. Of my existence. The people who previously occupied my increasingly fabulous home not only painted it all beige, which is not the focus of this post, but let the backyard apple tree grow to epic proportions without regard to health, safety, or how many freakin' apples would end up on the ground feeding our now pestilent insect population. It's so large that my apple picker won't reach the top boughs. When I'm standing on the deck.

Right.

All fragments aside, I do loathe this tree, and I had every intention of either carefully molding it down to manageable size, or chopping it down entirely. It is a nuisance, and I've no time for nuisances.

Now that I've ranted a diva's portion, let me show you what I did decide to do with the apples my boys and I could gather.
Don't you just imagine that this is what jelly in heaven looks like? I, of course, agree wholeheartedly. Rather than peel, core, slice, mash, or otherwise push myself to the brink of insanity by dissecting and cooking down my smaller than the grocery store sized apples, I opted to chop them up, combine them intelligently with other bounties of our garden, and create my first jalapeño jelly. Oh, and it's divine, made completely with organic ingredients from our garden, excepting the two things I can't grow here: cranberries and sugar. No added pectin, colors, or flavours, just delicious freshness, sweetness, and a kick that reminds you that this pairs as well with peanut butter as it does with smooth cream cheese.

Jalapeño Jelly
adapted from Simply Recipes
yield 4-6 cups jelly

I doubled this, but it proved a massive challenge to my cookware restraints, especially during boiling. It did, however, set up just fine, since it used natural pectin and sugar to do sorather than store bought stuff.

4 lbs of tart apples (e.g. Granny Smith), unpeeled, chopped into big pieces, including the cores
5 jalapeño chili peppers, chopped (remove the ribs and seeds to make it mild)
1 serrano pepper, chopped (you could replace this with another jalapeño if you want)
1 bell pepper, seeds and ribs removed, chopped
1 cup cranberries (optional but recommended, will help with color and with setting)
3 cups water
3 cups white vinegar
3 1/2 cups sugar (7/8 cup for each cup of juice)

Combine the apple pieces, apple cores (needed for their pectin content), jalapenos, bell pepper, cranberries (if using), water and vinegar in a large pot. Bring to a boil and then reduce heat to medium-low, simmering for about 20 minutes, or until the apples, cranberries, and peppers are soft. Stir occasionally to make sure nothing is sticking to the bottom of the pan where it might burn. When apples are soft, use a potato masher or stick blender to mash up the apple pieces to the consistency of slightly runny apple sauce.

Spoon the mash into a douple layer of cheesecloth set inside a colander and set over a large bowl. Leave to strain for several hours or overnight—the longer it sits, the more juice and flavour you'll get. If your pulp is too thick, and nothing is coming out, you can add an extra 1/2 cup or cup of water to it. You want to end up with about 4 cups of juice, although I came up with 6-7 cups because I let it drain almost 24 hours.

Measure the juice, then pour into a large, wide, thick-bottomed pot. Add the sugar (7/8 a cup for each cup of juice—3 1/2 cups is a guide, use the 7/8 rule to get it just right.) Heat gently, stirring to make sure the sugar gets dissolved and doesn't stick to the bottom of the pan and burn. Bring to a boil and cook forEVER. The original recipe said 10-15 minutes, but I sat there for almost two hours last night carefully making sure it didn't boil over in my unacceptably-sized pot. Use a spoon to skim off the surface scum. Continue to boil until a candy thermometer shows that the temperature has reached 220-222°F (8-10°F above the boiling point at your altitude). Additional time needed for cooking can be anywhere from 10 minutes to an hour or longer, depending on the amount of water, sugar, and apple pectin in the mix. Candy thermometers aren't always the most reliable indicators of whether or not a jelly is done. Another way to test is put a half teaspoonful of the jelly on a chilled (in the freezer) plate. Allow the jelly to cool a few seconds, then push it with your fingertip. If it wrinkles up, it's ready. That's how I did it, and I'm happy with the results; for those checking, it was at 225˚ when it wrinkled on the plate.

Pour jelly into sterilized jars to within 1/4" of the top and seal in a hot water bath following good health guidelines.

20 September 2010

Quick Chocolate Sauce

This is new to me, and has to be one of the easiest and most delicious sauces I've ever had. 3 ingredients, one pot, 3 minutes, done. You're welcome.

Whisk together equal parts:
  • coconut oil
  • cocoa powder
  • honey
in a pot and bring to boiling over medium high heat. Simmer 1 minute, stirring constantly, then pour over your ice cream. It made my Neapolitan taste like an Almond Joy; oh baby yeah.

29 August 2010

Cucumber Bread with Peanut Lime Frosting

Doesn't that sound like an amazing Thai salad? I'll admit, the inspiration is that rich devil, pad thai, which has easily become one of my very favourite meals. Before this little adventure, I'd never made cucumber bread before, and I'm not sure I loved the recipe I found, so I'm not going to share it here. Perhaps one day I'll perfect it, but today is not that day. You can easily use your favourite zucchini bread recipe and substitute in cucumber for the zucchini. If we were like every other family in the world, we'd have zucchini coming out our ears right now, but we're not. Our zucchini have produced modestly and steadily, although I'm still caught off guard when one of the kids hauls in a giant specimen. Why couldn't I find that when I looked every day for the last week? Why couldn't I have plucked it from its plant when it was but a young and tender sprout instead of the Wagnerian behemoth being dragged by multiple children through out back door? Alas, our curse is not zucchini, but cucumber. We planted a veritable field of it, only to realize that no one in our house really grooves on it. Sure we love a little cucumber dressing with falafel, which we never eat, but other than scattered in lame salads and in a few batches of fridge pickles, ours is merely the home where good cucumbers go to die.

So, in an attempt to remedy that situation, I leaped headfirst into my first batch of cucumber bread. I made it sound awful, but it wasn't. It just wasn't quite perfect for going with the frosting; I think leaving out the cinnamon would have let that fresh cucumber taste really shine with the peanut and lime as it should have. So, here's the recipe I created that truly is worth every last calorie, and it need not be limited to cucumber bread. I daresay this would dress up any vegetable cake masquerading as a "bread:" cucumber, zucchini, pumpkin, carrot. I believe that it would even make a delightful topping for an actual cake, perhaps a white or strawberry flavoured one. Well, definitely a white one, anyway. After refrigerating, its nature is akin to a savory spread, and is a little dab of heaven on earth. You can always return it to its previous spreadable frosting state by whipping it with your mixer and maybe a dab of milk. Here it is:

Peanut Lime Frosting
*I didn't measure exactly as I made this, but went rather by taste. I suggest you do the same by conservatively adding ingredients, then adding a little more of whatever you think it needs.

1/2 cup butter (1 stick), softened
1/2 cup peanut butter
1/4 cup coconut milk
1 tsp sesame oil
zest and juice of 1 medium to large lime
1 tsp dark soy sauce* (yup, you read right)
1/4 tsp salt
3-4 cups powdered sugar

Combine butter and peanut butter in a medium bowl and beat until combined and fluffy. Add coconut milk, oil, lime juice and zest, soy sauce, and salt, and mix well. Add powdered sugar 1 cup at a time until desired consistency is reached (I used close to 4 cups.) Use immediately, or refrigerate and rewhip to soften when needed. It's quite an amazing spread when served chilled and just soft enough to smear over a crust of bread.

*I've not substituted in regular soy sauce, so I can't testify to the viability of a substitution here. You could always leave it out if you're too afraid (you chicken!)

18 July 2010

Trail Mix Drop Cookies


Yes, that's really the best name I could come up with for these protein-packed little buggers. I'm pretty sure there are enough nutrients in these that they could be used as a meal replacement during times of duress, famine, or high-adventure sojourns in the Black Hills. Or for tomorrow when they sound better than a salad.

It's only fair that I send a warning with these cookies: they are not one of those tried and true, go-to when you need perfection type of cookies. These are for those unpredictable adventurous days when you have a hankering for a few wonderful things that would be even better enrobed in not-too sweet perfection. They'll be different every time you make them, so hitch on your sturdy boots, grab your jaunty adventure hat, throw caution to wind and use these as your "I'm better than a recipe" protein punch that really just tastes like a quick summer ball of gooey goodness.

Here's the basics:

1/2 cup fat—butter is always my preference for these endeavours
1 cup sugar
1 Tbsp corn syrup (optional; not HFCS, if you just freaked out . . .)
1 tsp vanilla (or wah-nilla; it's your choice, really)
1/4 tsp baking soda
3.5-4 cups assorted mix-ins that reflect your current mood, desires, tastes, or intentions. I suggest:
  • nuts (almonds, walnuts, pecans, peanuts, brazils, hazels, macadamias) chopped roughly if large
  • seeds (sunflower, pumpkin, flax, etc. salted or unsalted—it's your adventure!)
  • dried fruit (raisins, cranberries, dates, figs, pineapple, apple, banana, papaya, etc.)
  • candy (any type of baking morsel—chocolate, PB, white choc, M&Ms, Reese's Pieces, etc.)
  • rolled oats—I recommend using at least a cup of these for heartiness and overall perfection.
Combine your 4-5 cups of good things in a large bowl and set side. Combine fat, sugar, and corn syrup in a heavy-bottomed saucepan over medium heat. It likely won't mix well, but that's okay because boiling it should fix that. Heat until mixture begins to boil, then reduce heat and simmer for 1-2 minutes. This is a small batch, so it doesn't have to boil very long to reach a caramel state, and you don't want it very hard or you won't be able to eat them. Remove from heat, mix in vanilla, being careful of splatter. Stir in baking soda and watch that baby foam. This foaming action makes it easier to spread the goo among the goodies, plus it's like a middle school science lab in your kitchen. Pour foamy sugar syrup over your reserved bowl of good things. Stir well, adding more mix-ins (I suggest using oats here) to thicken as needed. The mixture should be the consistency of a thick cookie dough. Drop by heaping tablespoon onto foil or paper and let cool. You could also press them into a greased 9x13 and cut them after they set. Eat. Be happy. Get a protein fix by accident.

That's the skeleton. Here's tonight's realization that made my whole family (even the nut-hater) happy to be alive.

1/2 cup coconut oil
1/2 cup white sugar
1/3 cup agave nectar
1 Tbsp corn syrup
1 tsp vanilla
1/4 tsp baking soda
3/4 cup roughly chopped walnuts
3/4 cups roughly chopped almonds
1/2 cup pepita (raw pumpkin seeds)
1/2 cup mini chocolate chips
1 cup+ rolled oats

I really didn't measure the oats, I just put them in after the rest was mixed until I liked the consistency. There's my best guess. These weren't too sweet nor too plain, and the agave not only kept them soft, but lent a beautiful complex flavour to the sweetness.

Break away! Have an adventure! Make cookies that are easy and aren't the same as the last time you had them!

Now that's living on the edge.

26 February 2010

Doughnuts

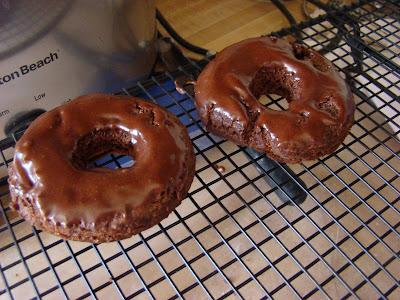
I've feared doughnuts my whole life, both as a food that will, without question, kill me and as a food I could never imagine tackling in my own kitchen. That's not to say that I haven't tried my share, because, believe you me, I have. Well, I have officially conquered both fears and present these homemade lovelies as proof of my progress. I don't like to brag, oh who am I kidding?— these are the best cake doughnuts I've had in my entire life: Moist, flavorful, fresh, lightly sweet, and perfectly cake doughnut-y (Amy, I think of you when I say that word, but I'm not sure why; hmmm . . .)
These come from my recent acquisition and new slice of heaven, The Craft of Baking by Karen DeMasco. This book is brimming with cookies, breads, cakes, brownies, ice cream, candies, tarts, and pies that are individually delicious and collectively spectacular. She even provides instruction on stocking an intelligent pantry and using basic recipes as a springboard for your own spectacular creations.
My inital fears about doughnuts largely involved the combination of yeast and hot oil. These, however, are cake doughnuts and not on yeast, but baking soda and powder for leavening. DeMasco, of course, illuminates this important difference the book so that now I'm not only a spectacular baker (what did I say about braggin'?), but one that is empowered by knowledge. Have similar fears about doughnuts? Start with the cakey variety, which I recommend anyway, because, let's face it, cake doughnuts are hearty, flavorful and don't squish into sugary pancakes when you accidentally smash them with your hand. The hot oil? It's still hot oil, but I did get to use peanut oil for the first time, and it really does heat beautifully. The only drawback to the process was constantly adjusting the temperature and moving the pan because my *$#@ ceramic cooktop stove wouldn't maintain a steady temperature. It's getting replaced in June, no question about it.

Chocolate Cake Doughnuts with Chocolate Crackle Glaze
adapted from The Craft of Baking by Karen DeMasco

Doughnuts
3 ounces bittersweet chocolate, chopped
3 Tbsp unsalted butter
1 3/4 cups flour, plus more for dusting
1/2 cup granulated sugar
1 Tbsp unsweetened cocoa powder
2 tsp baking powder
1/2 tsp baking soda
1/2 tsp sea salt
1/2 cup plus 1 Tbsp buttermilk or 1/2 cup plus 1 tsp milk+2 tsp cider vinegar (what I did)
1 large egg
1 large egg yolk

Glaze
1 cup confectioner's sugar
2 Tbsp cocoa powder
1/2 tsp pure vanilla extract
1/4 tsp sea salt

Melt the chocolate and butter together in a heatproof bowl set over a pan of simmering water. Turn off heat, but leave the bowl over the water to stay warm. Sift together1 cup of flour, granulated sugar, cocoa powder, baking powder, baking soda, and salt. In a second bowl prepare your wet ingredients: If you're souring your own milk, combine vinegar and milk and let it sit for 3 minutes, stir, then whisk with egg and egg yolk. Make a well in the center of the dry ingredients, pour in the milk mixture, the use a rubber spatula told two or three times. Add the chocolate mixture and fold together until smooth and shiny (they looked like a thick brownie batter to me.)

Transfer the dough to a 12 x 14 sheet of waxed paper and top with another sheet of waxed paper. Using a rolling pin, and with a gentle hand, roll out dough to about 10 x 12 and 3/4-inch thick. I rerolled mine a couple times because I made them too thin. I think I could have left mine thicker and been happy. Take that disc of dough and put it in the freezer for 1/2 hour to firm up. Don't skip this step because you won't be able to cut them if you do.

When dough is firm, remove from freezer and remove top sheet of paper. Sprinkle lightly with flour and replace the waxed paper. Invert and pull off the bottom sheet; the dough will now move freely for cutting. Use a 3-inch circle or drinking glass (I used the children's cups from IKEA) to cut circles and a 1-inch cutter for the holes. Transfer cut doughnuts to a lightly sprayed cookie sheet, and re-roll the dough (I did it between paper each time) until you have 10 doughnuts and 10 doughnut hole. You may get more or fewer depending on your cutter and dough thickness.

If you'd like to save these for later (because they're best eaten fresh) then cover them with plastic wrap and stick them in the fridge until you're ready, up to 1 day. If you're ready to fry, then continue.

Heat 2 inches of peanut oil in a heavy, high-sided pan. I used my cast iron chicken fryer and it was excellent. Use a thermometer to monitor the temperature and heat to 350˚. While the oil is heating, prepare your glaze by whisking together confectioner's sugar and cocoa. Add vanilla and 2 Tbsp water and whisk to smooth. It will be thick, but will soften upon contact with the warm doughnuts. Layer paper towels for draining and pull out a cooling rack for, well, cooling.

When all is prepared, fry the doughnuts, three at a time in hot oil, carefully turning them with a slotted spoon or wire skimmer halfway through, about 45 seconds on each side. I found the time to be exactly as the recipe specified.

Drain on paper towels. As soon as the batch is warm enough to handle, dip one side of each doughnut in the glaze and transfer to a rack to cool and harden. If the glaze is too thick to coat properly, whisk in a few drops of water to thin it out. I sprinkled a few of the doughnut holes with coarse kosher salt because, well, I adore salty sweets. The salt was undetectable, but the enhanced chocolate goodness when compared the original was quite noticeable; I recommend the salt. If you don't use to much glaze, like I did on a few, the glaze will contour to the doughnuts surface and crackle upon cooling. I recommend milk.

20 February 2010

Chocolate Truffle Pie

A couple weeks ago, one of my students asked if I ever created recipes rather than using those created by others. His question was one of curiosity, but I reinterpreted it as a challenge to spur me to greater things. I mean, sure, I make up pasta dishes and chicken dishes and even sometimes something with a little pork, but rarely do I experiment when it comes to sweet somethings. What's the point when there are so many perfect recipes so readily available? So, my first item of sweet experimentation was one that could easily be served in small portions to a crowd, because let's face it, this baby is rich. Make sure you have some cream to whip.
Chocolate Truffle Pie

For the crust:
5 oz. chocolate teddy grahams
1/3 cup sugar
1 tsp sea salt
5 Tbsp butter, melted

For the Pie:
1 1/3 cups heavy whipping cream, divided
16 ounces (1 pound) dark chocolate, chopped, divided (chocolate chips can work here!)
1/3 cup water
1/2 packet unflavored gelatin

For the crust:
Put the teddy grahams, sugar and salt in a food processor fitted with the steel blade. Pulse until fine, then add butter and pulse until combined. Press into bottom and up sides of a springform pan.

For the filling:
Place 8 oz. chopped chocolate in a heatproof bowl. Place 2/3 cup cream in a small saucepan and heat over medium-low heat until it comes to a simmer. Immediately pour cream over chocolate and let sit for 2-3 minutes, until chocolate is softened. With a whisk or spoon, start in the middle of the cream, and slowly stir in concentric circles until chocolate and cream are completely combined. If you whip it quickly, it will fill with air and lose its rich truffle consistency. Pour into prepared crust, spread carefully and evenly, then refrigerate.

For the second layer, in the bowl of a stand mixer or other large bowl in which you'll use a hand mixer, sprinkle gelatin over water and let soften. Repeat the above steps with the remaining cream and chocolate. After you have stirred them together, pour the shiny mixture into the mixing bowl with the gelatin and whip to stiff peaks. This may take up to 20 minutes because the cream won't whip until it cools. To speed up cooling, place the mixing bowl in an ice bath for whipping. When cream is stiff, spoon it into crust and smooth the top. Refrigerate until smooth.

Slice small and serve with unsweetened (my favorite) or lightly sweetened fresh whipped cream.

30 January 2010

Homemade S'mores

This week's amazing victory was s'mores. Yes, homemade s'mores. Yes, completely homemade s'mores. The graham crackers were a little chewier than I was expecting, but I think I could have rolled them thinner to avoid that. The chewiness made them perfect with the marshmallows, though. Just so we're clear, home-made marshmallows are amazing, and far superior in both taste and texture to their store-bagged counterparts. And, as long as you're willing to not touch the marshmallows with your fingers during preparation, they are simple to make, especially with a stand mixer. Finger touching will, inevitably, lead to strings of marshmallow web on everything you touch, including your face, eyelashes, and hair. I successfully heeded the counsel of others in this respect, and I now pass it on to you. I will admit that I did not make the chocolate sauce from scratch because we had some chocolate chips that needed to be used and I was without heavy cream. The ganache would have been better, but I did what I could. Just melt a half-cup of those chocolate bits down with a teaspoon or so of lard (YES, I used lard in cooking; so sue me) and the chocolate sauce is ready to go. Here's the recipe and photo; they were simply amazing. Keep in mind that they both take some chilling time, so plan ahead if you're going to make them.


Graham Crackers
Adapted from Nancy Silverton’s Pastries from the La Brea Bakery

Makes 48 2-inch squares

2 cups plus 2 tablespoons unbleached all-purpose flour
1/2 cup with whole wheat flour
1 cup brown sugar, lightly packed
1 teaspoon baking soda
3/4 teaspoon kosher or coarse sea salt
7 tablespoons unsalted butter, cut into 1-inch cubes and frozen
1/3 cup mild-flavored honey, such as clover
1 Tbsp molasses (optional—it gives a nice dark bite that I loved)
5 tablespoons milk
2 tablespoons pure vanilla extract

Topping (optional)
1 1/2 tablespoons granulated sugar
1/2 teaspoon ground cinnamon

Make the dough: Combine the flour, brown sugar, baking soda, and salt in the bowl of a food processor fitted with the steel blade or in the bowl of an electric mixer fitted with the paddle attachment. Pulse or mix on low to incorporate. Add the butter and pulse on and off on and off, or mix on low, until the mixture is the consistency of a coarse meal.

If you don't have a food processor or electric mixer, you can cut the ingredients together with a pastry blender. Just make sure they're very well incorporated.

In a small bowl, whisk together the honey, molasses, milk, and vanilla extract. Add to the flour mixture and pulse on and off a few times or mix on low until the dough barely comes together. It will be very soft and sticky. Lay out a large piece of plastic wrap and dust it lightly with flour, then turn the dough out onto it and pat it into a rectangle about 1-inch thick. Wrap it, then chill it until firm, at least 2 hours. Meanwhile, prepare the topping, if using, by combining the sugar and cinnamon in a small bowl and setting aside.

Roll out the crackers: Divide the dough in half and return one half to the refrigerator. Sift an even layer of flour onto the work surface and roll the dough into a long rectangle about 1/8 inch thick. The thinner it is, the crispier your crackers will be. The dough will be sticky, so flour as necessary. Cut into 2-inch squares using a fluted pastry wheel or pizza cutter.

Place the crackers on one or two parchment-lined baking sheets and sprinkle with the topping. Be sure to space them well or they will bake together, and no one wants that. Chill until firm, about 30 to 45 minutes in the fridge or 15 to 20 minutes in the freezer. Repeat with the second batch of dough. Finally, gather any scraps together into a ball, chill until firm, and re-roll.

Adjust the oven rack to the upper and lower positions and preheat the oven to 350°F.

Decorate the crackers: Using a toothpick or skewer (I like the blunt end of a wooden skewer for more dramatic dots) prick the dough to form a pattern of dots. Don't skip this step or your crackers will puff more than they should.

Bake for 15 to 25 minutes, until browned and slightly firm to the touch, rotating the sheets halfway through to ensure even baking. Remove to racks to cool, and store in an airtight container at room temperature.

Marshmallows
Adapted from Gourmet, December 1998

Makes about 96 1-inch cubed marshmallows

About 1 cup confectioners’ sugar
3 1/2 envelopes (2 tablespoons plus 2 1/2 teaspoons) unflavored gelatin
1 cup cold water, divided
2 cups granulated sugar
1/2 cup light corn syrup
1/4 teaspoon salt
2 large egg whites
1 tablespoon vanilla (alternately: 1/2 of a scraped vanilla bean, 2 teaspoons almond or mint extract or maybe even some food coloring for tinting)

Oil bottom and sides of a 13- by 9- by 2-inch rectangular metal baking pan and dust bottom and sides with some confectioners’ sugar. Do it well, being careful not to leave any gaps.

In bowl of a standing electric mixer or in a large bowl sprinkle gelatin over 1/2 cup cold cold water, and let stand to soften.

In a 3-quart heavy saucepan cook granulated sugar, corn syrup, second 1/2 cup of cold water, and salt over low heat, stirring with a wooden spoon, until sugar is dissolved. Increase heat to moderate and boil mixture, without stirring, until a candy or digital thermometer registers 240°F, about 12 minutes. Remove pan from heat and pour sugar mixture over gelatin mixture, stirring until gelatin is dissolved.

With standing or a hand-held electric mixer beat mixture on high speed until white, thick, and nearly tripled in volume, about six minutes if using standing mixer or about 10 minutes if using hand-held mixer. This is one of the most amazing chemical/physical changes I've ever witnessed in my culinary experience.

In separate medium bowl with cleaned beaters beat egg whites until they just hold stiff peaks. Beat whites and vanilla (or your choice of flavoring) into sugar mixture until just combined. Pour mixture into baking pan and don’t go crazy about getting it all out—you won't. Sift 1/4 cup confectioners sugar evenly over top. Chill marshmallow, uncovered, until firm, at least three hours.

Run a thin knife around edges of pan and invert pan onto a large cutting board. Lifting up one corner of inverted pan, with fingers loosen marshmallow and ease onto cutting board. With a large knife or oiled pizza cutter trim edges of marshmallow and cut marshmallow into roughly one-inch cubes. Sift remaining confectioners’ sugar back into your now-empty baking pan, and roll the marshmallows through it, on all six sides, before shaking off the excess and packing them away. Make sure you don't neglect covering them in sugar–if you don't do it, they'll stick to each and everything else.

These kept about a week in a zip-top bag for us.

S'mores
Do I really need to tell you how to put together a s'more? I thought not.

10 January 2010

Chocolate Fitness Cake

The title is off-putting all by itself, isn't it? When confronted with such a title, my mind conjures up a vision of a weak cocoa-dusted confection stuffed with shredded carrots, black beans, and perhaps a stalk or two of broccoli. Maybe you imagine a cauliflower puree, or perhaps a zucchini-infused sham of health that calls itself bread when really it's a cake in a loaf pan. Whatever your vision of a "chocolate fitness cake," I am here to help you shift that paradigm.

Now, I'm not a big believer in New Year's resolutions. That said, I understand them, and I most understand that they follow the excesses of the holidays celebrated by many of the world's major religions, political groups, ethnicities, and cultures. After a little excess, one like to reevaluate and find ways to not only recover from that excess, but to continue in the vein of improvement. To you who resolve, or make plans, or set goals, or redefine, or realize that you really like things the way they are, I say, "Happy New Year!" And to celebrate this fine dawn, I present you with perhaps one of the most deceptive desserts I've ever encountered. Don't fool yourself, this is no Chocolate Truffle Cake, but it's a serious shot of rich chocolate during a time when people are traditionally passing over the rich shot of chocolate for something, um, greener and more fibrous, although chocolate itself is rather fiber laden (between 21 and 33 grams of fiber for every 100 grams of cocoa powder—that's about a cup.) Enjoy it for what it is—dark and rich, not too sweet, and rather moist and delicious, as well as for what it isn't—fatty, sugary, starchy, or bland. It's good enough to serve company, although I would make sure you have a little (light) whipped cream to go with it. Mine wanted it tonight.

Chocolate Fitness Cake
from The Great Book of Chocolate by David Lebovitz

6 servings

3/4 cup (75 grams) unsweetened cocoa powder, regular or dutch-processed [I used regular this time, and it was plenty chocolate]
1/2 cup+3 Tbsp (100 grams+ 35 grams) granulated sugar, divided
7 large egg whites

[Yes, that's all the ingredients, and while the instructions look long, I can sum it up like this: whip the whites to soft peaks, fold in everything else, then bake. Very simple.]

Preheat the oven to 325˚F. Butter a 2-quart soufflé mold or similar-sized over-proof baking dish or bowl. [I used an 8-inch springform; it worked well this time.] Sift or whisk together the cocoa powder and the 1/2 cup sugar to remove any lumps.

Whip the egg whites until they form soft, droppy peaks. Whip in the remaining 3 Tbsp of sugar. Carefully fold in the cocoa mixture in 3 batches, just until incorporated, stopping just before the mixture becomes smooth. Do not overfold.

Transfer the mixture into the soufflé mold or baking dish. Set the mold in a larger pan. Add warm water to the larger pan so that the water reaches 1-2 inches up the side of the mold, creating a water bath. [Now, I skipped this because my springform isn't water tight and I didn't want a watery cake. My cake came out a little misshapen, and I think the bain-marie would have fixed it, so I say use it.]

Bake 35-40 minutes [start checking around 28-29 if you're using my oven], until cake is barely set in the center. [It was fine at 35, but I think I overcooked it a little, and it left it feeling ever so slightly dry. Avoiding this might negate the need for cream when serving.] Remove the cake from the water bath. Wait 5 minutes, then invert onto a serving plate and serve.

Chocolate Fitness Cake is lovely served warm [as I served it], although it can be served at room temperature and will keep 2 days if wrapped in plastic. Mr. Lebovitz likes his topped with honey-drizzled orange segments, but also suggests fresh mint and white chocolate Crème Anglaise. These would, of course, do serious damage to the idea that one is eating a healthy dessert.

By my estimates, the entire cake contains about 800 calories, which of course, puts you in a state of complete mental shock on the 10th of January. And, yes, that's quite a load if you plan to eat the entire thing yourself. It is, however, merely a trifle when compared to just about any other chocolate cake recipe you'll ever see. The recipe says it serves six (134 kcal/serving) but I cut it in 8 (100 kcal/serving) and it was a nice little shot of chocolate heaven. You will likely never again see caloric information on this site, but I had a hunch this time of year it might yield a little gratitude.

13 December 2009

Baked: New Frontiers in Baking


The acquisition of my latest cookbook was a month-long adventure culminating in not one, but two copies of what is now my go-to for everything cookie, bar, brownie, or cake. It's not just a book of reliable recipes; I mean, Better Homes and Gardens puts out one of those every year. This is different. This is a transcendent collection of fail-proof compilations that run the gamut from the simple and direct (Peanut Butter Cookies) to the brand new (Root Beer Bundt Cake) to the absolutely sublime (The Baked Brownie, awarded Best Brownie in America by multiple sources, including The Today Show.)

This is no small reference manual, but an arsenal of confectionary weaponry that is to be wielded both carefully and, at times, with reckless abandon. Despite these obviously favorable aspects, I've not yet mentioned the best part, but I'll do that now. The best part is simply that, for a bakery-influenced tome, this cookbook is downright manly. From the brown-orange color scheme to the direct and simple photography to the antler-influenced design elements, this is a man's book. And why shouldn't it be? Authors Matt Lewis and Renato Poliafito haven't always been bakers or cookbook writers. These are recent developments in the lives of two daring men who traded in careers in advertising and amassed life savings to open their dream bakery in New York city. These are real, non-trained, non-fussy men who opened a bakery and put their recipes in a cookbook, and I love them for it.

The book is Baked: New Frontiers in Baking (even the title is testosterone infused) and it currently holds a prominent position on my cookbook shelf. I've not tried everything, but everything I've tried has made my taste buds dance. You're not going to find any spun sugar or fussy egg white concoctions, but you'll find plenty of chocolate, butter, peanut butter, pecans, and caramel. They take everything you love about sweets and make it just a little richer, just a little more exciting. Take for example their Peanut Butter Crispy Bars. We've all had Rice Crispie squares four or five hundred times in our lives, and we all have a soft spot in out hearts for them. Lewis and Poliafito take it one better by making a true sugar and butter caramel for the rather thin crispie layer (don't panic, it only takes about 4 minutes) and layering onto it a molten peanut butter chocolate layer and a just firm enough chocolate topping. Rice Crispie Treat has become Peanut Butter Crispy Bar in a rich, decadent, artery-clogging way that you and your friends will never forget. Ever. No wonder it's the best selling bar at the bakery.

I had a similar blissful with the Millionare's Shortbread which is, as they described, a rich-man's Twix bar. I think the description shortchanges the bars immensely, but whatever; it's their book. I'm prepping myself to make The Baked Bar, the famous Baked Brownie, The Root Beer Bundt Cake (Christmas list a Bundt pan for me, will you?), the Raspberry Crumb Breakfast Bar, Bourbon Chocolate Pecan Pie, and a host of others. Tonight, however, was dedicated to Sweet and Salty Cake, the most requested and best selling item at the bakery. This recipe has some steps. It involves making caramel twice, and the frosting alone has both a pound of chocolate and a pound of butter. Even better, it uses fleur de sel which cannot be purchased within 50 miles of my home, I am sure (I substituted regular old coarse sea salt, and I'm not disappointed.)

MY EXPERIENCES: This recipe looks rather long and complex, and it is, just a bit. I made it over two days, making the cake on day, then freezing it, double wrapped, overnight. Day two brought the caramel, frosting and assembly so that no one day was too overwhelming. It's easily adaptable to your hectic schedule. Also, I would level the cake just so you have a raw top into which the caramel can seep. I had a little caramel dribble in the center when I cut it. I mean, it's no big deal, but it would have been nice if it had soaked into the crumb instead. Last note: don't be afraid of the salt. Use a good, chunky sea or kosher salt (or fleur de sel, of course) and layer it on. The multiple chocolates are rich and dark, and the caramel is extra sweet; the salt is a vital player to make the flavors balance, and I think I skimped a little.


Sweet and Salty Cake
adapted from Baked: New Frontiers in Baking

For the Classic Chocolate Cake Layer
3/4 cup dark unsweetened cocoa powder
1 1/4 cups hot water
2/3 cup sour cream
2 2/3 cups all-purpose flour
1 tsp. baking soda
1/2 tsp. salt
3/4 cup unsalted butter, softened
1/2 cup vegetable shortening
1 1/2 cups granulated sugar
1 cup firmly packed dark brown sugar (I used regular brown sugar)
3 large eggs, at room temperature
1 Tbsp pure vanilla extract

For the Salted Caramel
1/2 cup heavy cream
1 tsp sleur de sel (I used coarse sea salt, but regular table salt is not recommended)
1 cup sugar
2 Tbsp light corn syrup
1/4 cup sour cream

For the Whipped Caramel Ganache Frosting
1 pound dark chocolate (60-70% cocoa), chopped
1 1/2 cups heavy cream
1 cup sugar
2 Tbsp light corn syrup
2 cups (4 sticks) unsalted butter, soft, but cool, cut into 1/2-inch pieces

To assemble the cake
2 tsp fleur de sel (again, I used coarse sea salt), plus more for garnish

MAKE THE CHOCOLATE CAKE

Preheat the oven to 325˚F. Butter three 8-inch round cake pans, line the bottoms with parchment paper, and butter the parchment. Dust with flour, then knock out excess.

In a medium bowl, combine the cocoa powder, hot water, and sour cream, and set aside to cool.

Sift the flour, baking powder, baking soda, and salt together into a medium bowl and set aside.

In the bowl of an electric mixer fitted with the paddle attachment, beat the butter and shortening on medium speed until ribbonlike, about 5 minutes. Add the sugars and beat until light and fluffy, about 5 minutes. Add the eggs, one at a time, beating well after each addition, then add the vanilla and beat until incorporated. Scrape down the bowl and mix again for 30 seconds.

Add the flour mixture, alternating with the cocoa mixture, in three additions, beginning and ending with the flour mixture.

Divide the batter among the prepared pans and smooth the tops. Bake for 35 to 40 minutes, rotating the pans halfway through baking, until a toothpick inserted in the center of each cake comes out clean. Transfer the cakes to a wire rack (or two) and let cool for 20 minutes. Invert the cakes onto the rack, remove the pans, and let cool completely. Remove the parchment.

MAKE THE SALTED CARAMEL

In a small saucepan, combine the cream and salt. Bring to a simmer over very low heat until the salt is dissolved. Meanwhile, keeping a close eye on the cream mixture so it doesn't burn, in a medium saucepan combine 1/4 cup water, the sugar, and corn syrup, stirring them together carefully so you don't splash the sides of the pan. Cook over high heat until an instant-read thermometer read 350˚F. [Watch carefully because this small amount of sugar spurts through temperature tiers quickly.] They say it takes 6-8 minutes, mine did it in 3-4. Remove from heat and let cool for 1 minute.

Add the cream mixture to the sugar mixture. Whisk in the sour cream. Let the caramel cool to room temperature, then transfer to an airtight container and refrigerate until you are ready to assemble the cake.

MAKE THE WHIPPED CARAMEL GANACHE FROSTING

Put the chopped chocolate in a large heatproof bowl and set aside. In a small saucepan, bring the cream to a simmer over very low heat.

Meanwhile, keeping a close eye on the cream mixture so it doesn't burn, in a medium saucepan combine 1/4 cup water, the sugar, and corn syrup, stirring them together carefully so you don't splash the sides of the pan. Cook over high heat until an instant-read thermometer read 350˚F, 6-8 minutes. Remove from heat and let caramel cool for 1 minute.

Add the cream to the caramel and stir to combine. Stir slowly for 2 minutes, then pour the caramel over the chocolate. Let the chocolate and caramel sit for 1 minute, then, starting in the center of the bowl, and working your way out to the edges, slowly stir the chocolate and caramel mixture in a circle until the chocolate is completely melted. Let the mixture cool, then transfer it to the bowl of an electric mixer fitted with the paddle attachment.

Mix on low speed until the bowl feel cool to the touch. Increase the speed to medium-high and gradually add the butter, beating until thoroughly incorporated. Scrape down the bowl and beat on high speed until the mixture is fluffy. [This part was ambiguous to me, so I went for firm peaks, neither soft nor stiff, from the cream. To achieve that in an acceptable amount of time, I had to put an ice bath around my mixing bowl. Perhaps I'm just impatient, but it worked, so I'm happy.]

ASSEMBLE THE CAKE

Plae one cake layer on a serving platter. Spread 1/4 cup of the caramel over the top. Let the caramel soak into the cake (mine didn't because the cake was already flat and didn't need to be leveled), then spread 3/4 cup of the ganache frosting over the caramel. Sprinkle with 1 tsp salt, then top with second layer. Repeat the process, then top with third layer. Spread with remaining caramel. Crumb coat the cake and put the cake in the refrigerator for 15 minutes to firm up the frosting. Remove from fridge, the frost the sides and top with the remaining frosting. Garnish with a sprinkle of salt.

This cake will keep beautifully in a cake saver at room temperature (cool and humidity free) for up to 3 days. If your room is not cool, place the cake in a cake saver and refrigerate for up to 3 days. Remove the cake from the refrigerator and let it sit at room temperature at least 2 hours before serving.